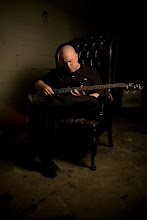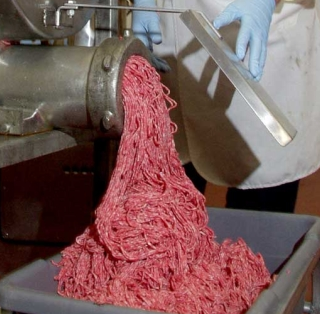
Nine Inch Nails has been getting a lot of press in recent days now that iTunes is allowing fans to stream the full album before it is officially released, but it's one of the technical details of the release that has me more interested than the actual music. In response to the infamous "Loudness Wars" (read about it here, if you're unfamiliar), Trent Reznor has elected to make the digital release of his new album available in two different versions.
The first, which will be the version available via iTunes, Amazon, and the other big digital music retailers, is the standard "loud" master that tends to be the standard for mainstream music these days - loud at the expense of dynamics. The second version, which will be available via NIN.com, will be an "audiophile" master which, while not as loud, preserves the dynamics and represents the music more faithfully.
I applaud Mr. Reznor for this decision and hope other artists will follow. The only way we're going to dial back from the "turn everything into a brick" mentality, is if larger artists reject it, or at least offer their fans the option to buy a copy with preserved dynamics.
[via Synthtopia]
Showing posts with label Dynamics. Show all posts
Thursday, August 29, 2013
Thursday, August 4, 2011
Dada Life Presents Sausage Fattener
While I've often lamented the lack of dynamics in so much modern music, sometimes you really just need something that sounds totally bricked. Dada Life created Sausage Fattener with just that goal in mind... Simple controls and just $29 for both Windows (VST) and Mac (VST/AU).
Labels:
Dada Life,
Dynamics,
Mac Software,
PC Software,
Plug-ins,
Videos
Tuesday, January 11, 2011
What is an Expander?
Compression is one of those effects that has become integral in getting a balanced, modern-sounding mix, but few people these days seem to know much about compression's less popular brother, expansion.Whereas a compressor reduces the dynamic range of a signal (making the quiet parts louder, and the louder parts quieter), an expander's job is to - wait for it - expand the dynamic range of a signal (push down the levels of the quiet material and push up the level of the louder material). Simple enough. But why would you want to do this?
Let's say you have a rhythm guitar track you've recorded. The performance is great, but the recording is less than optimal with quite a bit of noise in it. An expander, with the right settings, will reduce the level of the quiet signals (ie the noise floor), while making the parts you want (the guitar) louder. The end result is, your recording doesn't sound as obviously noisy as before. The noise is still there, it's just that it's masked by the loudness of the guitar when it's playing and suppressed when nothing is playing.
Expansion isn't a miracle worker, though. If you've got a drum loop that is completely smashed into oblivion with clipping or a limiter, you're not going to be able to restore it to its pristine, original state. Signals that have been compressed to a lesser extent may be able to regain a slightly more transient-centric sound, but there are limits to what it can really do.
Nowadays, with softsynths that can be bounced directly to audio without ever leaving your computer, noise is less of an issue, and expansion is probably on its way to becoming more or less obsolete - especially with all the transient-shaping plug-ins that do a better job of breathing life back into over compressed signals. But in the right circumstances, expansion can be a really valuable tool to have at your disposal, and as far as I'm concerned you can never have too many tools.
Labels:
Dynamics
Tuesday, November 23, 2010
Add Some Beef to Your Beats

If you're doing club music, you know that getting the low end just right is extremely important. Of course, you're much better off spending some time auditioning sounds at the beginning to find a sound that is close to what you want already than trying to whip it into shape with plug-ins, but sometimes you still need to do some tweaking. It's no surprise that there are a number of bass enhancement plug-ins out there, each of which work in slightly different ways and vary in quality. But if all you need to do is add some sub to your kicks, you probably already have the tools to do so.
I'll be working in Logic, but you should be able to replicate this fairly easily on any DAW that allows side-chaining and includes a noise gate.
1. Select the track containing the kick drum you want to beef up. Side-chaining in Logic needs to be done via buses, so we need to send our kick drum to a bus. Under the SENDS section of your track's channel, select Bus 1 from the drop down menu and dial the send knob all the way up.
2. We don't need to actually hear the signal coming through the bus, though, so on the channel strip for Bus 1, change the OUTPUT from STEREO OUT to NO OUTPUT. You'll find this menu right below the name of the bus. Now we have the kick drum being sent audibly through our audio channel, and being sent silently to Bus 1.
The reason we don't want to hear the output of the bus is because we're just going to be using it as a control signal, not an audio signal. SIDE-CHAINING is the process of using the audio from one channel to control some aspect of a plug-in on another channel. This is most commonly used in dance music where a kick drum is side-chained with a compressor on a pad or strings to create a pumping effect. We're going to do something similar here.
3. First we need something to side-chain, though. So create a new instrument track and insert an instance of any synth that has a good sine-wave on it. If you can't think of any and are using Logic, just called up an instance of EXS-24. It defaults to a sine wave sample. Record a long, sustained note. Be careful to choose a note that fits the key of your song. This is where the beef if going to come from, so having an 'off' note will really make a mess of your low end.
4. On the channel strip of your sine wave instrument, insert a side-chainable noise gate. I'm using Logic's included NOISE GATE. Firstly, we need to select a source for our side-chaining. So hit the drop down menu in the upper right hand corner of Noise Gate and select BUS 1, where we sent our kick drum. You'll need to experiment with different settings, but initially start out with your ATTACK at o, your HOLD at 60ms, and your release at 12ms. It's especially important to have a bit of a release at the end, as this prevents annoying clicks. Now, press play and adjust the THRESHOLD value until you can hear your sine wave coming through right beneath the kick drum, hopefully adding the sub energy you're looking for.
Don't stop here, though. Try effecting your sine wave channel in different ways - overdrive it or saturate it to add harmonics, sculpt it to perfection with EQ, etc.
Labels:
Dynamics,
Logic,
Production Techniques,
Tutorials
Thursday, January 21, 2010
One You Might Have Missed: Yohng W1 Limiter
Looking for a good brickwall limiter but can't afford those schmancy Waves plug-ins? Look no further than the Yohng W1 Limiter, which its creator claims is an exact clone of Waves' famous L1 Limiter for the Mac. Oh, and did I mention it's free? I've never used the L1 before, so I can't compare the two, but W1 definitely sounds great. It's perhaps not the best choice if you're looking for subtlety, but if you need go into "HULK SMASH" mode, give it a try!
Labels:
Dynamics,
Free Plug-Ins,
Mac Software,
Mastering
Monday, January 4, 2010
NPR Story on the Loudness Wars
NPR just ran a new story on the Loudness Wars in which engineer Bob Ludwig does a pretty good job of explaining the phenomenon in terms anyone can understand. A good article to share with your non-musician friends.
Labels:
Dynamics,
The Science of Music
Thursday, June 18, 2009
Making 80's Gated Drum Sounds

There are certain production techniques (some might say "gimmicks"), that put an unmistakable date-of-birth stamp on the music they were used on. And while there is this risk of dating your music when you use gimmicks like this, the good news is, most production trends eventually come back into fashion again at a later date. So it never hurts to bone up on some of these techniques.
One such iconic technique is the so-called "Phil Collins drum sound". It's a fancy way of referring to using gated reverb on drums, and, in fact, is a bit of a misnomer. While it is true that the production technique became known to most people via tracks like "In the Air Tonight" (
1. Open up your DAW, and create a software instrument track. Assign this to whatever your favorite drum instrument is. Go ahead and sequence 4 bars of snare backbeats on the 2 and the 4 of each bar.
2. In the INSERTS section on the instrument's mixer channel, open up an instance of SPACE DESIGNER or whatever your reverb of choice is. For purposes of this exercise, we'll use SPACE DESIGNER's default setting, but any hall or more lengthy type of reverb will work.
3. After the instance of SPACE DESIGNER, add the NOISE GATE effect (found in the DYNAMICS sub-folder) as an insert below it. As the name implies, noise gates were originally designed to shut off the noise on a channel when there was no voice or instrument playing on it. Quite literally, it is a "gate" that only lets in the instrument or vocal parts you recorded, and shuts the volume down on the in between periods, thus preventing any noise on that track from contributing to the overall noise level of the song. (This isn't as much of an essential in the digital age since softsynths don't create any noise and most DAWS have some sort of command like Logic's STRIP SILENCE that allow you to cut this out in advance.) Anyway, the most important setting on a NOISE GATE is the threshold, which is the volume level that decides when this virtual gate is open versus when it closes. Padgham discovered that if he put a NOISE GATE after a reverb (usually the opposite was done), he could set the threshold so the reverb's tail got cut off in a pleasantly artificial way that actually added a nice edge of aggression to drum sounds.
4. So let's set up the NOISE GATE to create this effect, shall we? First, go ahead and set the NOISE GATE ATTACK setting to 0 ms. This is a percussive sound, so we want the gate to open immediately when the THRESHOLD level is exceeded.
5. Similarly, we want to turn the HOLD level down to 0 ms. You can tweak this later to adjust the envelope of the gate a bit, but for the most part, we want this to sound abrupt for right now.
6. Set the RELEASE setting to about 55.0 ms. This helps make the cutoff a little less severe, but you may find going all the way down to 0 ms sounds fine depending on how extreme an effect you are after.
7. Next, set the HYSTERESIS setting to -20.0 db. Not all GATE effects have this setting, but it is generally used to make the gating a bit less extreme. We're after the extreme effect, though, so drop that sucka to 0.
8. Finally, we adjust the most important setting, the THRESHOLD. This setting determines the volume level of the signal required to keep the GATE open. Because we want that short, chopped effect, we want a higher setting on the THRESHOLD. Try setting it around -15 db and seeing where that gets you. Again, the correct setting depends on how extreme an effect you are after and what the original signal is like. Tweak it to taste.
Here is an example showing a normal snare with a little ambience first, followed by a gated reverb snare. Back in the day this technique was use on kicks, snares, and toms, but keep in mind, a little goes a long way. It's not an effect you will want to use every day, but when you are after that extra 'oomph' it can really do the trick. (By the way, it can be cool on synths too... artists like Depeche Mode and Wumpscut used this on their earlier material quite a bit!)
Labels:
Drums,
Dynamics,
Production Techniques,
Reverb,
Sound Design,
Tutorials
Subscribe to:
Posts (Atom)