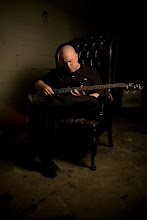
 It's been 7 years, but tonight Assemblage 23 returns to the city of broad shoulder at the Abbey. Come out and see us!
Friday, April 30, 2010
Tonight: Assemblage 23 Live in Chicago
 It's been 7 years, but tonight Assemblage 23 returns to the city of broad shoulder at the Abbey. Come out and see us!
Labels:
Crass Plugs,
Live Performance
Thursday, April 29, 2010
Tonight: Assemblage 23 Live in Indianapolis

The first show my band ever played was nearly 15 years ago in Indianapolis, Indiana of all places. Tonight we return to the scene of the crime. There's something special planned for the last song, so don't miss it if you are in the area!
Labels:
Crass Plugs,
Live Performance
Wednesday, April 28, 2010
New Trent Reznor Project: How to Destroy Angels

When Trent Reznor announced he was putting Nine Inch Nails on hiatus, many people wondered what he'd do next. It looks like we'll have an answer to that question this summer when he releases the debut from his new project How to Destroy Angels (presumably a tip of the hat to the Coil song of the same name), apparently a collaboration with his wife. You can check out a video teaser here, which definitely has Reznor's sound to it...
Tonight: Assemblage 23 Live in Pittsburgh
Labels:
Crass Plugs,
Live Performance
Tuesday, April 27, 2010
The Death of the Floppy Disk

It looks as if the end of an era is upon us, as UPI reports that Sony will stop manufacturing floppy disks as of March 2011. While this will have little effect on most of us, it is worth keeping in mind if you're a fan of vintage samplers and synths (such as the Ensoniq SQ-80) that use this medium for sound and sequence storage. Time to stock up!
Labels:
Storage Media,
Technology
Sunday, April 25, 2010
Tonight: Assemblage 23 Live in Providence, RI
Labels:
Crass Plugs,
Live Performance
Saturday, April 24, 2010
Tonight: Assemblage 23 Live in New York City
Tonight my band will be playing at Santo's Party House in Brooklyn. Just a reminder so you don't fugettaboutit.
Labels:
Crass Plugs,
Live Performance
Friday, April 23, 2010
Tonight: Assemblage 23 Live in Philadelphia

My band will be playing at Club Polaris in my old stomping grounds, Philly tonight. Eat some artery decimating food and come see us! (We'll also be doing an in-store meet n' greet at Digital Ferret Records from 6-7 PM...)
Labels:
Crass Plugs,
Live Performance
Wednesday, April 21, 2010
Preparing Your Tracks for Mastering
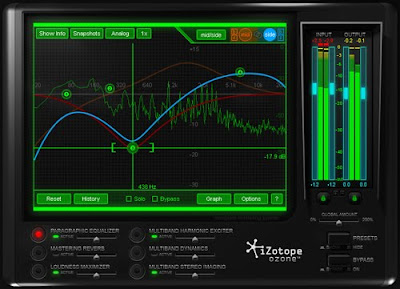
Aside from poor mixing, one of the biggest problems mastering engineers encounter on a regular basis is receiving improperly prepared pre-masters. So today, I thought I'd share some tips on getting your music ready to be mastered with a minimum of hassles for the mastering engineer. Remember, the less time they've got to spend trying to undo problems caused on your end, the more time they'll have to focus on the music itself.
1. Communicate
It's vital to communicate exactly what you want to your mastering engineer before starting the process. Is it important to you to preserve the dynamics as much as possible, or are you looking to compress and limit your tracks back to the Stone Age? It might be helpful if you can point to another release in your style whose mastering you like to give the engineer a practical example of what you want. Likewise, listen to what your mastering person has to say. Rely on their expertise. After all, if you don't trust their knowledge and experience, why'd you hire them in the first place?
2. Leave Fade Outs to the Mastering Stage
Fade outs aren't as common as they used to be back in the day, but if you want some in your tracks, leave it to your mastering engineer to apply. This is partially because any fades you apply will be re-shaped by the dynamics processing the engineer does, but additionally, the mastering engineer probably has access to more precise tools to give you smoother, more musical fades. Again, be sure to communicate with your engineer to give him an idea of the length of fades you're envisioning, etc.
3. Bounce Your Pre-masters With Space Before and After the Song
As a precaution, it's always a good idea to leave about 3-5 seconds of dead space both before and after each song when you bounce them out. This helps avoid unwanted clicks at the start, possible "buffer burp" errors, or prematurely cut off reverb/delay tails at the end. The mastering engineer will appreciate the extra flexibility, too.
4. Leave Your Master Bus Alone
It's becoming increasingly and depressingly more common these days for bands to strap a limiter or compressor across the master bus of their DAW. There are many reasons this is a bad idea. The most obvious of these is that you're tying your mastering person's hands from the get-go. Dynamics processing is damn near impossible to undo, so if you've pre-squashed your audio, destroyed your transients, or clipped your recording, there's not much, if anything the engineer can do to fix it. Ask yourself again why you're hiring and paying for a mastering engineer if you don't trust them to get things right. Same goes for EQ. If your mix sounds unbalanced to the point that you have to apply an EQ to the entire track, it's better to take the time EQing the individual tracks until the balance is where it should be. Putting anything across your master bus is usually a pretty good indication that you haven't got the mix right yet.
5. Max Headroom
Be sure when you bounce your tracks out, that your meters aren't slamming into the red. Most DAWs these days will emulate the soft clipping you would get from an analog mixer, but again, you are squashing the dynamics before the mastering engineer even gets their hands on it. So be sure you have plenty of headroom on your bounces (within reason, obviously).
6. Garbage In, Garbage Out
One of the biggest misconceptions about mastering is that it can make a crappy mix sound great. Sure, there are some extremely talented mastering engineers out there, but they'd probably be the first to tell you that cases like this basically turn them into professional turd-polishers. Sure, it might be a slightly shinier turd, but at the end of the day, it's still a turd. So don't expect outright miracles from your mastering engineer. The final product is your baby, so take time to get it right.
7. Check and Double Check
A good number of problems that arise during a mastering session are from totally avoidable, stupid mistakes that weren't caught before they're sent out. So be sure to devote some time to quality control. I usually like to give the bounces a listen once on my monitors and once again with headphones. The headphone run-through makes it easier to pick up some of the more subtle problems, like, say, cut off audio on a track, or a cough you forgot to edit out of a vocal take. This can be a bit tedious, since you've probably listened to your track dozens, if not hundreds of time in the process of mixing it, but if it can save you from any hiccups and delays, I think it's well worth it.
Anyone have any other tips I might have missed? I'm sure we must have a mastering engineer or two here... feel free to chime in the contents to share more of your pet peeves or frequently encountered problems!
Labels:
Mastering
Tonight: Assemblage 23 Live in Washington D.C.
 My band will be playing at Jaxx in Washington D.C. (technically, Springfield, VA). Come on out and say hi!
Labels:
Crass Plugs,
Live Performance
Monday, April 19, 2010
Tonight: Assemblage 23 Live in Raleigh, NC
Labels:
Crass Plugs,
Live Performance
Sunday, April 18, 2010
Tonight: Assemblage 23 Live in Jacksonville, FL

My band will be playing a show tonight at Eclipse Nightclub in Jacksonville, FL. It'd be cool to meet some Waveformless readers there, so come on out!
Labels:
Crass Plugs,
Live Performance
Saturday, April 17, 2010
Assemblage 23 Video Tour Diary #5
Another update... sorry for the stretched out video... still learning Final Cut. Anyone clue me in to what that is about?
Labels:
Videos
Tonight: Assemblage 23 Live in West Palm, FL

If you happen to be in the area, come out to Respectable Street in West Palm, FL and check out my band tonight!
Labels:
Crass Plugs,
Live Performance
Friday, April 16, 2010
Another Approach to Gated Drum Sounds

Some time ago, I walked you through how to create your own 80's-tastic gated drum sounds. As with just about anything related to music production, however, there is more than one way to achieve an end. So today I want to show you an alternate, slightly more flexible way to create gated drum sounds.
The first step is to select your drum sounds. Once you have done so, apply a medium length hall or plate reverb to the sound in question. Whether you do this as a send or insert, you want a ratio of about 80% dry to 20% wet.
Once you've selected a reverb you like, go ahead and bounce your drum sound down to an audio file. Trim off any excess 'dead space' and load it into your sampler of choice.
Usually, when dealing with drum sounds, you'd select your sampler's "cycle" mode which plays the sample from start to finish no matter how long you hold down the key that triggers it. In this case, however, we want to turn this mode off so that the sample only plays as long as you are holding down a key.
Once you've done this, you can control the length of the "gate" simply by changing the length of the MIDI note. The advantage this holds over traditional gating is that literally each note can have its own gate length allowing for much more dynamic gated effects. For example, you can have a long reverb on the 2 and the 4, and have short, cut off "ghost" notes playing in between. The effect is wonderfully artificial and "fake" sounding, but can lead to some very cool sounding rhythms if you play around with it enough.
Tonight: Assemblage 23 Live in Orlando, FL
Labels:
Crass Plugs,
Live Performance
Wednesday, April 14, 2010
Making Any Effect Multi-Band
 If you've spent any significant amount of time filling your plug-in folder with effects, chances are, you've probably run into a multi-band effect or two. If you're not familiar with the concept, a multi-band effect divides the signal to be effected into separate frequency ranges (or "bands"), allowing you to assign completely different settings for each of these bands. This is most often used for compression effects (especially when mastering), allowing you to compress, for example, your bass frequencies a bit tighter than your mids or highs, or vice-versa. Pretty cool, right? The problem is, you generally only find multi-band effects to come in compression and distortion flavors. What if you wanted to make any plug-in in your folder multi-band capable? Or even crazier, what if you wanted to have completely separate effects on each frequency band? If your DAW has effects sends (and most do), this is surprisingly easy to do.
The first step is to figure out how many bands you really need. You are really only restricted by how many sends you have available through your DAW, but practically speaking, you'll want to keep this number as low as you can just to keep things simple. Once you've done this, go ahead and set up the necessary amount of sends on your channel and set the send level to 100%. You'll want to turn off the output of the main channel too, since you're bussing the signal to the sends.
The next step is to figure out what frequency ranges you want each send to cover. Once you've done that, assign an EQ to each send. You'll want a rather precise EQ for this purpose, as we're just using it to restrict the signal on each send to a specific band of frequencies. Look for a Linear Phase or Mastering EQ for a good start. Now, you'll want to go into the EQ on each send and define the frequency bands by using lowpass and hipass filters to set the high and low range of the frequency band for each send. For best results, you'll want to make sure these don't overlap very much, if at all, or you may run into some phasing problems.
Once you've divided each send into its own frequency band, the sky is the limit. You can either assign multiple copies of the same type of effect after the EQ on each send and tweak the settings individually to taste, or even assign completely different effects for more extreme and experimental results. Like the way one distortion sounds on the low end, but prefer a different one for higher frequencies? No problem! Want to have a sound where only high frequency sounds are sent to a delay? You can do that too. Want to send only the mid-range frequencies through a filter? Piece of cake. The sky is literally the limit here and you can get as complex and involved as you like. As with many things, simplicity usually yields the most useful results, but don't let that stop you from experimenting and trying out some crazy things.
Labels:
Effects,
Production Techniques,
Tutorials
Tonight: Assemblage 23 Live in Nashville, TN

My band will be performing live at the Rutledge in Nashville, TN tonight... come out and check us out!
Labels:
Crass Plugs,
Live Performance
Subscribe to:
Posts (Atom)


