Until recently, Logic users sometimes found themselves looking enviously at Pro Tools users for the easy ability that program possesses to replace drum sounds. This is a fairly common practice in the "real world" and often times producers replace the real snare on a track with a sampled one if the tone of the original snare isn't sounding right, or if they want a more consistent sound. So it's a bit surprising that this ability only showed up in Logic 9. Let's check it out...
The key here is that each drum sound needs to be on its own track. The drum replacer works by using transients in a piece of audio to generate MIDI notes that trigger an instance of EXS-24. Because of this dependence on transients, you want to make sure each sound has its own track so unwanted of excessive transients don't throw off the replacer.
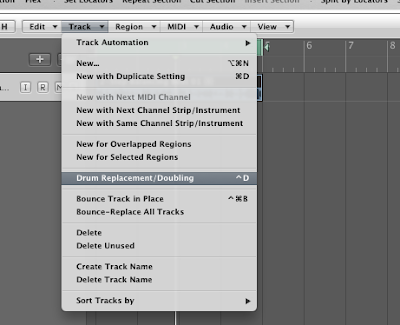
The first step is to select the audio track you wish to replace or double. Let's say it's a snare track. From the ARRANGE WINDOW go to the TRACK menu and select DRUM REPLACEMENT/DOUBLING. Logic will analyze your track for transients and automatically create a new AUDIO INSTRUMENT track with an instance of EXS-24 on it. A new window with controls for the drum replacer/doubler will open up with an array of controls to tweak.
The first is to select the type of track it is Kick, Snare, Tom, or Other. Changing this control automatically changes the EXS-24 samples you'll use to replace the original sound to the type of sound you're trying to replace. So if you set it to SNARE, it'll list all the snare samples available in the LIBRARY tab. If you set it to KICK, it'll list all the kicks for you to choose from.
Below this, you choose whether you want to replace or simply layer the new track on top of the old one. If you select REPLACE, then it will automatically mute the original audio track when you're done. If you select DOUBLE, it'll leave the original track untouched and you'll hear both the original and the new drum sound together.
Next you'll find the THRESHOLD control. This lets you restrict the triggering solely to notes that sound above a certain volume level. You could use this to double snare beats on the 2 and the 4 while ignoring any quieter 'ghost notes'. The results this produces are really pretty hit or miss and even with a lot of tweaking, you might not get results that are as "clean" as you'd like, but remember you can always edit the MIDI track this produces to clean up any unwanted notes.
Beneath the threshold control is the PRELISTEN button, which allows you to hear the results of your settings as you tweak the controls, and also allows you to audition different sounds.
This is followed by the TRIGGER NOTE control. It defaults to AUTO, which will play back your selected sample at its proper root key. But if you wanted to trigger that sound a bit lower for some grit or a bit higher for some punch, you can do that very simply by selecting a new trigger note from the menu.
Controls are available for offsetting the timing of your replacement/double track by a consistent amount and for setting an offset to the slicing position of your transients, but these are rather specialized controls you're unlikely to need to touch, so just leave them at their defaults.
Selecting OK will process your settings and make necessary adjustments. How easy was that?


No comments:
Post a Comment