When 10cc released their schmaltzy hit "I'm Not In Love
1. The first step is obviously getting a vocal recording. This is actually probably the most difficult part, because it's not really the same as recording vocals for a song. You need to pay much more attention to being consistent in your tone, getting a nice, long note, etc. So make lots of recordings. We're going after something synthetic sounding, so just single a single note will do, but do several takes of each, so you have something to choose from in case one option doesn't work.
2. Go through your takes, and find the one you think will work best. Ideally, you want something without much pitch wavering or vibrato. Crop the sample down so there is no dead space at the beginning and end of the recording. This next bit is optional, but I think it helps add to the synthy nature - If you have access to a pitch correction program like Antares Auto-Tune
3. Bounce out your vocal sample tuned up and with a little compression to smooth out any problematic volume fluctuations. Make sure you save it to wherever Alchemy stores its sample data on your computer. On Macs this is in the Library->Application Support->Camel Audio->Alchemy->Samples->User directory. PC users, consult your manual, I'm not looking it up for you. :)
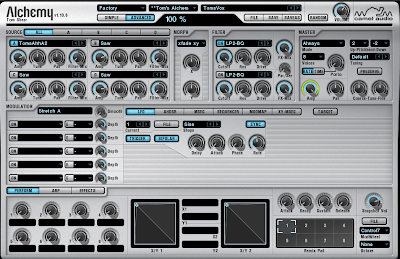
4. Source A should already be turned on, so click on the little window with the waveform name until a drop down menu appears. Select LOAD AUDIO and locate the voice sample from the USER list. Your sample is now mapped across the keyboard using the default GRANULAR ENGINE (be sure to experiment with the other engines as well).
5. The first thing we need to do is to set up the vocal sample for looping. So, select A from the SOURCE menu and select EDIT from the page that appears. The loop start and end markers are likely located at the very end of your sample, so find them and drag the start close to the beginning, but far enough into it that you are past the initial attack of the sample and into the sustaining portion. Bring the LOOP END back a little bit too, so it is also in the sustaining portion of your recording. Now change the LOOP drop down menu to read FORWARD/BACK. You can use the other options as well, but FORWARD/BACK looping usually creates the least noticeable results.
6. Hit The EDIT button again to go back to Alchemy's main page. Head down to the ENVELOPE section and adjust your ATTACK to around 5 seconds and the release to around 8.5 seconds.
7. You may already like the results at this point and decide you're done, but I like to make a few tweaks to the DENSITY and STRETCH settings in the upper left hand corner of the interface. Messing with these takes you a bit further away from the original sound and can make it sound a bit more synthetic. I found moving my DENSITY down to 3 GRAINS brightened the sound up a bit and gave it a very subtle grit. Bringing the STRETCH setting down to around 54% added a nicely ethereal "slow motion" quality to the sound.
8. Every good pad deserves a good reverb, so go ahead and hit the EFFECTS button, turn one of the slots ON and insert an instance of ACOUSTIC REVERB. Obviously the end result will vary wildly according to the source material, but you should have something like this:


No comments:
Post a Comment