Thursday, February 25, 2010

Cool, Short Alan Wilder Interview

Via dmdotcom

I know I said I wasn't going to post anything else this week, but I hadn't seen this posted anywhere else.  A short interview with Alan Wilder about him recently joining Depeche Mode on stage....

Tuesday, February 23, 2010

On My Way Home

Four connections in three countries and three trips through Customs.  I'm in for a hell of a day. 

I'll be taking the rest of the week off, so no new posts until next Monday.  See you then!

Mint Oberheim OB-1 on Ebay

Info at the listing...

UNOPENED Bee Gees' Rhythm Machine on Ebay

Just add your own grating falsetto vocals...

Monday, February 22, 2010

Tonight: Assemblage 23 in Perm, Russia

Tonight was to be the final date of my band's tour in Europe, but due to a Lufthansa pilot's strike, we have to cut the tour a date short to avoid being stuck in Russia for an extra 4 days.  We apologize to our fans (if any) in Perm, but we'll make every effort to come back to make it up to you.  

Saturday, February 20, 2010

Tonight: Assemblage 23 in Moscow, Russia


My band will be playing tonight with the always wonderful Mesh at Tochka in Moscow. Come out and drink silly amounts of vodka with us!

Friday, February 19, 2010

Synthesis Made Simple Part 12: Where Do You Go From Here?

So, I hope by now that the basics of subtractive synthesis are at least a little more clear to you than before (assuming you're a noob).  So what now?  

My first suggestion, would be to check out some of the posts I've made in the past regarding synth programming.  I have an ongoing series of articles called Roll Your Own Sounds where I take you through the process of how to program certain sounds.  These might make a bit more sense to you now, and will allow you to see the concepts and features we've discussed applied practically.  They'll also help introduce you to some new features such as OSCILLATOR SYNC and UNISON.

Here's an article I wrote on using the free TAL Bassline synth to make a kick drum.

Here's an article introducing the concept of RING MODULATION.

This post discusses use for NOISE in your sounds.

Here's one about using PITCH ENVELOPES to add a hard attack to bass sounds.

Here's something a bit more advanced: simulating old school video game music in Native Instruments Massive.

Also on the more advanced end of the spectrum is this article about a type of filter we haven't discussed here called a COMB FILTER.

What about resources outside of this blog?  Check out the Synth Secrets series by Sound on Sound Magazine.  Simon Cann offers a free version of his How to Make a Noise guide to synthesis, as well as a commercial version with additional content.  Finally, check out Howard Scarr's excellent Programming Analogue Synths guide on Access's site in the manual downloads section.


Tonight: Assemblage 23 in Rostov-on-Don, Russia


My band
will be performing tonight in Rostov-on-Don @ Podzemka. This'll be our first time playing here, so come on out and show us what you're made of!

Thursday, February 18, 2010

Synthesis Made Simple Part 11: Putting it All Together
So over the past couple of weeks, we discussed the basic ingredients that make up most synthetic sounds you're likely to hear. As you might expect, many synths are a lot more complex and offer many more options than we've outlined here, but don't worry about that yet. What you've (hopefully) learned here accounts for most of what you need to make your own sounds. Get a good handle on this stuff first, and once you feel confident with these fundamentals, feel free to crack open the manual and learn about the more advanced stuff.

So let's review: You start with some oscillators that you set to different waveforms to set a basic general timbre. You tune these oscillators against one another to taste, to make for more complex sounds. These oscillators are fed into a filter to set the basic bright/dark tonal balance and are usually modulated by an envelope and additional modulators to sculpt the tonal changes. From here, we assign different modulators to create more dynamic sounds that change under certain conditions.

This info gives you the fundamentals you need to understand how synthetic sounds are made. But there are some tips you can use to make your ventures into sound creation still easier:

1. ) Try to envision (en-listen?) the sound in your head before you program it - Does it have a high pitch or a low pitch? Is it a thin or fat sound? Is it bright or dark? Does it have a fast attack or does it fade in? Does the sound stop immediately after you let go of the keys or does it fade out? How does the sound change throughout the course of the note? If you analyze and break down sounds this way and think of how those characteristics relate to the basics we've gone over here, you'll find creating them is a lot easier.

2.) Start with a preset that is closest to what you envision - Yes, obviously you want to make your own sounds as original as possible but there is no use doing more programming than you have to. So look for a preset that is at least somewhat similar to the sound you're after as your starting point. If there is nothing very close, at least choose a patch that is of the same type as what you're after - a pad, an organ, a bass, etc. This will at least save you from having to do too much re-programming of the envelopes, etc.

3.) Take apart presets you like to see what makes them tick - One of the best ways to improve your synth programming chops is to look under the hood of preset sounds you like. Look at all the settings that make up a sound. If you can't figure out what parameters are contributing what qualities to the sound, try tweaking different parameters until you figure it out. Looking at the work of experienced programmers is a great way to learn new tricks.

4.) Don't be afraid to get lost - Many synths are a lot more complicated than the basics I laid out here. Don't hesitate to experiment and try crazy things, even if you are completely ignorant of what they do. You'll figure it out. This is actually the way I learned to program. I just called up a preset and changed various parameters to figure out what they did. Remember that you can't hurt anything by messing around with a sound unless you overwrite it. So go crazy. If there is a parameter you're not familiar with, try setting it to extreme values so the effect it has will be more obvious.

5.) Expand your definition of synth programming - Synths are getting more complicated all the time, but if you find your sounds pale in comparison to what you're hearing on your favorite albums, remember that most sounds you hear on commercial albums are heavily layered. So don't think of a synth sound as being the end all, be all. Think of how you can combine completed sounds from different synths into still more complex sounds.

6.) The sound is just the start - It's a good idea to master the basics before you get too deeply into sound design, but once you do, remember that any sound needn't be considered "finished" at the source. Learn to use effects like they are merely extra synthesis tools. Use reverbs to create space or resonances, delays to create rhythmic interest, distortion and filters to alter the harmonic content, use chorus to fatten up thin sounds, use flangers or phasers to create further movement. Just mess around. Create insane, long chains of plug-ins or effects to your synth sounds and see how much deeper than you can make them.

7.) Start simple - Learning to program your own sounds is fun, and as concepts start to click with you, you'll find yourself eager to learn more. When you're starting out, however, stick with a synth with simple, minimal features. With less extraneous features to distract you, you can focus on learning the important basics with minimal confusion. For free synths, I highly recommend Togu Audio Line's excellent Bassline (based on the Roland SH-101 monosynth) or U-no-62 (based on the Juno-60) as great, simple, starter synths. In the commercial realm, check out Korg's Polysix emulation in the Analog Legacy bundle.

8.) Don't get discouraged - Like anything new, you're going to suck at sound programming at first. Don't get discouraged if you're not able to instantly start programming the sounds you imagine in your head. Keep at it and experiment, experiment, experiment. You'll be amazed at how quickly you'll start to pick things up.


Tonight: Assemblage 23 in Volgograd, Russia


If you happen to be in Volgograd, Russia tonight, my band will be in town playing a show @Zvezdny (and visiting our secret girlfriend Mother Russia...)

Wednesday, February 17, 2010

Synthesis Made Simple Part 10: Using Modulation Practically
So by now, you should have a basic idea of the concept of modulation, and you've met the two most common modulators: the envelope and the LFO. To fill out your knowledge of modulation a bit more, this post will be less an article than it will be a couple of lists. The first of these will give you some definitions of other common modulators you might run into, and the second will be a list of various examples of ways you might want to modulate a sound and how to achieve it. 


ADDITIONAL COMMON MODULATIONS SOURCES


The Mod Wheel - As you probably gathered, the "mod" in "mod wheel" stands for modulation. Virtually every keyboard synth you will run into will have a mod wheel located next to the pitch bend wheel. (Some older Roland and Korg synths have joysticks where side to side movements bend the pitch, and forward movement acts as a mod controller, but the concept is the same.) The mod wheel doesn't have a function until you assign it one, so it can do just about whatever you want it to. Common uses are to trigger a vibrato effect that can be faded in or opening the filter cutoff. But it can be assigned to anything your synth allows you to modulate.


The Pitch Bend Wheel - Since the pitch bend wheel is already hard-wired to change the pitch of your oscillators, it's not something most people use for other modulation purposes that often, but many synths do allow it. If you assign it to open the filter, your sound will rise in pitch and get brighter as you advance the wheel.


Velocity - Velocity is simply a measure of how hard you hit a key. If you play a key on a piano softly, the sound you produce will be someone quiet and subdued. Hit it harder, though, and it's much louder, brighter, and more aggressive. It's this ability that allows us to make instruments that allow for expressive playing just like "real" instruments. The most common destination to modulate with velocity is amplitude, so the harder you play, the louder the sound gets. Filter cutoff is another popular choice. Real sounds tend to get brighter as they are played harder, so you can emulate that, or you can do really complex sounding, modulating synth riffs. Remember, on many synths you can modulate by negative amounts too, so you could create a sound that was loud when you played lightly and quiet when you played it hard if you wanted to. Why you'd want to, I don't know, but you can do it.


Pressure - Pressure allows you to apply modulation to notes you are already sustaining. Play a chord and as you're sustaining the chord, you press harder on the keys to apply the modulation. This is great for pads when assigned to filter cutoff, as it allows you to do really expressive swells. The important thing to remember is that this is not a polyphonic effect. That is to say, it will look at a chord you're playing, and whatever note you're playing with the most pressure will effect the modulation for ALL the notes you're playing.


Channel Pressure - Less common than plain old pressure, channel or polyphonic pressure operates the same way, but it will treat each note individually. Thus, if you're playing two notes at a time, one very lightly, and one very hard, the note triggered with a soft touch will have less modulation applied to it than the one you played hard, which will have lots of modulation applied to it. This is obviously a still more expressive form of modulation. In addition to the popular amplitude or filter cutoff destinations, if you apply it to oscillator pitch, you can emulate the sometimes odd pitch bends within chords on pedal steel guitars.


Key Scaling/Following - This varies the amount of modulation that is applied to the modulator based on the position of the key on the keyboard. With a positive mod amount, the amount of modulation increases the higher the note you're playing is on the keyboard. You can guess what a negative amount would do. This is most commonly used on filter cutoff. Many times, the filter setting that is perfect for the low end of your keyboard is too dark or muffled in the higher notes, so this allows you to compensate for that and have higher cutoff values on them.


PRACTICAL USES FOR MODULATION

Add a vibrato effect - Assign an LFO as your modulation source with your oscillator(s) pitch as the destination. Your modulation amount can be positive or negative, but should be for a relatively low amount to avoid the "crazy siren" effect. LFO waveform should generally be a triangle, although sine can work as well. Using a square wave here with more intense modulation amounts can create trills.


Add a dubstep wobble effect - Set your filter cutoff and resonance to a medium setting. Assign an LFO as your modulation source with the filter cutoff as the destination and a positive modulation amount to taste. If your synth will sync the LFO to note values, try using triplet or dotted eighth notes. Feed it through some distortion and you're good to go.


Add an auto-pan effect - Set an LFO as your mod source, with your sound's PAN position as the destination. Higher modulation amount values will result in more extreme panning, while more moderate values will generally be a bit more useful. If your synth allows your LFO to sync to a note value, try setting it to 2-3 bars.


Use pressure to bend the pitch - Assign pressure (or channel pressure, if available) as your mod source, and your oscillator(s) pitch as the destination.


Use velocity to make a sound brighter as you play harder - Assign velocity as your mod source and filter cutoff as the destination with a positive modulation amount.


Use velocity to make a sound louder as you play harder - Assign velocity as your mod source and the sound's VOLUME or AMP level as the destination with a positive modulation amount.


There's just a few to get you started. Take some time to explore your synth's modulation options. Some will have more than others, and as you get comfortable using modulation, you'll come to really appreciate synths with deep mod options. Remember also that with most synths, you can have multiple modulation sources modulating multiple destinations at once, so you can see the potential for really complex, evolving sounds on a synth with great modulation capabilities. Next post, I'll wrap things up with some advice to keep in mind when you're programming your own sounds.

Vermona PerFourMer on Ebay

Info at the listing...

Moog Memorymoog on Ebay

Info at the listing...

Tuesday, February 16, 2010

Synthesis Made Simple: Part 9 - Your Friend the LFO

Last time around, we discussed envelopes, one of the tools you can use to perform automated modulation of various synth parameters. As you'll recall, envelopes are perfect for modulations that take place over time and happen once each time a key is pressed. So what if you need a modulation that repeats regularly? That just happens to be the strength of the LFO.

The acronym LFO stands for "Low Frequency Oscillator." As the name suggests, this is an oscillator just like we talked about early in this series, but with an important difference - it plays at frequencies that are below the range of our hearing. So what good is an oscillator you can't hear? LFO's aren't used as an audio signal. Instead, they're used as a control signal.

An LFO is like that robot assistant I mentioned a couple posts back. It smoothly and repeatedly turns the value of whatever parameter you assign it to up and down automatically. Instead of using programmed ADSR values to determine the 'shape' of the modulation, an LFO takes the shape of the waveform it's producing and uses that to create the modulation. The LFO waveforms you'll find on almost any synth are the same 'classic' analog waveforms we discussed at the beginning of this series. Thus, the upward slope of a triangle wave increases the value of the modulation, while the downward slope decreases it. A sinewave does the same thing, but the peaks and valleys are a bit more smoothed out. A sawtooth will result in modulation that continuously rises and then drops off sharply over and over. A squarewave will produce a modulation that goes back and forth between two values. These modulations will repeat for as long as you hold the note.

Some synths will have an additional option among the LFO waveforms called 'SAMPLE & HOLD'. Fuller-featured synths might even have a dedicated Sample & Hold Generator. Sample and hold generates random values (the 'sampling' part) and holds them for a period of time before changing to yet another random value. If you assign it to modulate your filter cutoff, you open the door to complex, changing burbling effects like this:


Assign it to modulate the pitch of one of your audio oscillators, and you get R2-D2/sci-fi type sound effects like this:


Like an audio oscillator, all LFOs have a frequency control. On an audio oscillator, the frequency value changes the pitch, but on an LFO, it controls the speed of the modulation. This allows you to create filter sweeps that take place over several bars at slow speeds, or to create vibrato effects at higher speeds and everything in between. Most modern synths allow you to sync your LFO to the tempo of your host/sequencer, so you can have changes in the sound take place over musically coherent periods. Older synths, however, generally lack this capability, so getting synced LFO effects is a little trickier with them.

Another parameter you might run into on an LFO is DELAY. The delay parameter does just what it says. It waits a pre-determined amount of time before allowing the LFO to kick in. Think of a cello player who plays a note and as it sustains gently adds in some vibrato. Delay allows you to replicate that.

If this all seems a bit confusing, here are some practical examples that'll hopefully clear things up a bit. In this first example, an LFO with a TRIANGLE wave modulates the filter cutoff. It starts with a low frequency value, and gradually increases the frequency. The triangle wave is probably the one you'll use the most when it comes to modulation:


The most common use of LFOs is to add vibrato. You do this by assigning it to modulate the pitch of your oscillator(s). For these types of effects, you generally want to keep the modulation amount pretty conservative, otherwise you end up with something that sounds like a siren. Here is an LFO set to the TRIANGLE wave modulating the pitch of a sawtooth oscillator:


If you've got a stereo synth, you can even use an LFO to modulate the pan position of a sound for instant, auto-panning . Here, I'm using a sine wave to cause the sound to pan back and forth in the stereo field:


LFOs are great for creating pulsing, rhythmic effects, too. Here, I am using an LFO set to a squarewave to modulate the amplitude, resulting in what sounds like a simple sequenced part  playing quarter notes, but is actually produced from sustained whole notes:


As you can see, LFOs are extremely useful and have a wide number of possible applications all of which can add a sense of movement to your sounds.  What's better, most modern synths offer you several LFOs which can all be assigned to different waveforms/values to modulate separate synth parameters. Which is a good thing, because once you get used to using LFOs to modulate sounds, it can get addictive.


Paia Fatman on Ebay

Info at the listing...

Sidstation Ninja Edition on Ebay

Info at the listing...

Korg Micro Preset on Ebay

Info at the listing...

Monday, February 15, 2010

Synthesis Made Simple Part 8: The Envelope, Please

In the previous post, I described a scenario in which you adjust the volume of your car radio as you’re driving to make it louder when a song you like comes on or to make it quieter when you get a ring on your cell phone. Nothing we probably haven't all done before, but all that fiddling about can be a bit distracting while you’re driving. Wouldn’t it be great if you had a little robot friend that could automatically adjust the volume knob for you? In a sense, that’s exactly what MODULATORS do - they automatically change whatever parameters they're assigned to, leaving your hands free to play. The most common type of modulator in the synth world is what is called an ENVELOPE.


An envelope is used to perform one time, non-repeating modulations to a sound that occur over a period of time. I don’t mean to keep bringing up the example of plucking a note on a guitar, but it really is a great example for explaining a lot of concepts of synthesis. So imagine you pluck a note. Over time it goes from a bright, loud initial pluck (the ATTACK) fading down (the DECAY) to a mellower sustaining portion (the SUSTAIN), until it eventually fades out (the RELEASE). This type of modulation is what envelopes are designed for. Think of an envelope like a mini timeline that allows you to define changes to a parameter over the course of the time you hold a note.


The most common type of envelope you’ll find on synths is called an ADSR envelope. The name refers to the portions of the sound I just mentioned above. For the sake of introducing you to envelopes, I’m going to be talking about using an ADSR envelope to modulate the volume or amplitude of a sound. Virtually every synth that ever existed at the very least has an envelope dedicated to modulating the amplitude of your sound. Often, they can do much more than that, but let’s not get ahead of ourselves.


When you first play a note, you are triggering the ATTACK portion of the sound. Not all sounds start the exact moment you begin playing. Sure, if you play a piano or organ, the sound begins the moment you press the key. But sounds like flutes or strings actually “fade” in a bit. It takes time for them to reach the maximum volume. Thus, a sound that starts instantaneously would have the lowest attack value possible, whereas a sound that fades in like strings or a synth pad, would have a higher attack value.


Most real world sounds don’t maintain the same volume level from start to finish. Instead, after the initial attack, the sound tends to drop down in volume a bit. The time it takes for the sound to go from that initial louder attack to the quieter SUSTAIN (more on that in a second), is what is known as the DECAY time.  A low decay value would very quickly move on to the sustain portion (great for synth bass sounds), whereas a higher decay value might take longer to reach it (like a piano).


Unlike attack or decay, which are time values, the SUSTAIN level is an amount level. If we’re talking about an AMPLITUDE ENVELOPE, the sustain level is the volume a note eventually settles on after the initial attack decays down.  In general, a higher value will be useful for infinitely sustaining sounds like pads, where a level of zero wouldn't sustain at all.


Finally, we have the RELEASE portion of the envelope. Put simply, this is the time it takes for the sound to fade out after you’ve released the key. If you play an organ, the sound cuts off immediately after you let go of a key. On the other hand, if you play a note on an acoustic piano, the sound gradually fades out after you let go as the vibration of the strings and the body of the piano die out. Thus, a low release value will end the note close to the time you release the key, whereas a longer release will take time to fade out. In addition to being useful for simulating the way real instruments operate, longer release values can be useful for creating more atmospheric sounds, as it can very simplistically emulate reverb.


So envelopes can be useful for shaping the volume of a sound throughout the time you hold a key. But they aren’t limited to just this. Even the simplest monosynth generally allows you to use an envelope to modulate the filter cutoff as well. In fact, this is so common, that you’ll probably remember I mentioned that most filters have a dedicated parameter for determining what influence the envelope has on the cutoff. Using envelopes to modulate the cutoff lets you emulate the bright initial attack of a sound and the drop off that usually follows. Or to imitate the swell of an ocean wave. Basically, any time you need the frequency content of your sound (the bright/dark level) to change over time, a filter envelope is there to serve you.


Another common thing envelopes are used to modulate is oscillator pitch. Some acoustic sounds, like a trumpet, have an initial ‘blip’ in the pitch at the attack portion of the sound before it settles to the note you’re playing. This happens extremely quickly, but it has a great effect in how each note sounds. Or, take a sound like the classic 808 kick drum. It starts at a higher pitch, and slowly drops down to get that classic ‘DOOOOOOOOoooooooong’ sound.  Most modern synths will allow you to modulate pitch with an envelope, but this is a bit rarer on older ones.


So, what if I want to use an envelope to modulate more than one of these parameters at once, but I don’t want them to all modulate in the same way or at the same speed? Fortunately, most synths are equipped with more than a single envelope. So you could have a different envelope for your pitch, your filter cutoff, AND your amplitude. Not ALL synths allow this, but most at least have separate envelopes available to modulate the amplitude and filter cutoff separately. Thus, you can have a sound that starts playing the moment you press the key (via the amplitude envelope), but that goes from dark to bright (the filter envelope) as you play it.


So envelopes are clearly very useful to create modulations that only occur once (some synths DO allow you to loop an envelope, but this is relatively rare). What if you want a modulation that repeats regularly? Think of a cello player who plays a note and adds some vibrato to the note as it sustains. Vibrato is a repeating pitch modulation. This sort of effect is the domain of the LFO which we'll talk about next time!

Friday, February 12, 2010

Synthesis Made Simple Part 7: An Introduction to Modulation
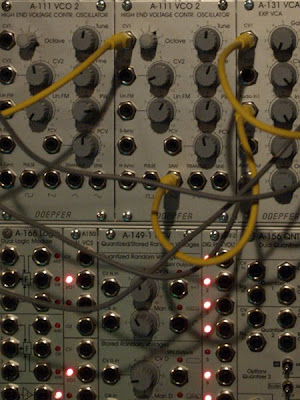
Imagine you’re driving in your car and your favorite song comes on the radio. You reach down to turn it up, but then your cell phone rings, so you turn it back down again so you can hear your phone conversation. In synth programming terms, you just MODULATED the AMPLITUDE of your radio.


MODULATION refers to the dynamic alteration of a synth parameter. Put more simply, modulation is what allows you to have sounds that change or evolve over time (even if it’s only over the course of a second or less). This is useful not only because it makes for more interesting sounds, but because it allows you to imitate the way “real world” instruments tend to work. Play a key on a piano and it doesn’t sustain, unchanging forever. The frequencies drop off from the bright attack to increasingly mellower tones. The amplitude (volume) of the sound starts out loud and eventually decays to nothing.


So what is it that actually controls this modulation and makes these types of changes possible? That's up to you. When you’re talking about modulation, you have to define what is going to do the modulating (called the MODULATOR or MOD SOURCE, or SOURCE), and what parameter is going to be modulated (usually called the DESTINATION or TARGET). Additionally, if your synth allows it, you need to define whether the modulator will modulate the parameter by a positive amount (increasing the parameter value relative to its current value), or a negative amount (decreasing the parameter value).


What you have available to you to assign as a modulation source/destination depends on what synth you’re using. Some very simple synths may only allow you to use the mod wheel to add modulation in the form of vibrato on the oscillators. At the other extreme, well-appointed modular synths, will allow you to modulate virtually any parameter with any other parameter. Most synths fall somewhere in the middle, allowing you to assign a dozen or so different modulators to a few dozen different synth parameters. Regardless of these differences, the principle itself is always the same: a source modulates a destination via a positive or negative value.


We're going to talk some more about modulation a couple posts from now, but first I want to introduce you to the two most common modulation sources you will run into in your synth programming adventures: the envelope and the LFO.

Free Sample Friday: SH-101 Hard PWM Bass
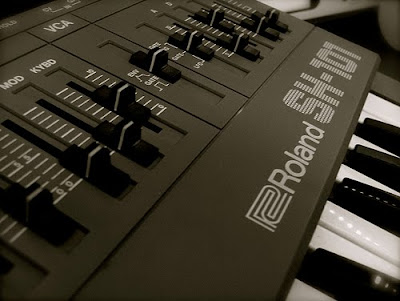
Another Friday is upon us and that means it's free sample time! Today's giveaway is a multi-octave, multi-sampled (9 notes) pulse width modulation synth bass courtesy of my Roland SH-101. Perfect for old school EBM or anything that needs a sort of hard-edged analog bass. Samples are mono 24-bit/44.1k WAV samples. Enjoy!


Tonight: Assemblage 23 in Paris, France

Tonight my band will be playing at Le Klub in Paris. Come on out if you've got nothing better to do!

Thursday, February 11, 2010

Synthesis Made Simple: Part 6 - Types of Filter
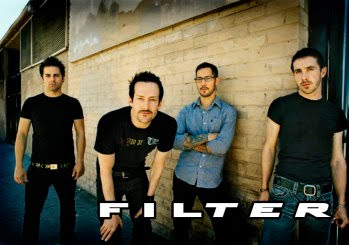

Well, no, not THAT filter. We're talking about synth filters. Sorry, Richard Patrick. Maybe next time.


Much as oscillators have different “flavors” in the form of waveforms, filters come in a variety of different types, too. The reality is, some softsynths these days have a mind-bending array of different filter types, but we’re going to concentrate on the 3 ‘basic’ types you are most likely to encounter: LOWPASS, HIGHPASS, and BANDPASS.

As you’ll recall, we already discussed the basic function of a filter is to filter out frequencies past a user-defined “cutoff” point. But how do we know if it’s going to filter off the frequencies above or below the cutoff frequency? That’s where filter type comes in.


The LOWPASS filter is by far the most common type of filter you’ll come across. In fact, especially on older synths, it may be the ONLY type of filter you find. A lowpass filter filters out the frequencies above the cutoff value. In other words, it lets the frequencies beLOW the cutoff to PASS through. Get it? Low cutoff values will sound very dark and muffled (if at all), and as you increase the cutoff value, the sound will get brighter as you allow more high frequencies through. A healthy majority of the electronic sounds you have heard were probably made with a lowpass filter. Here is an example with 2 sawtooth oscillators, detuned a bit, and fed through a lowpass that sweeps from a low cutoff value to a high one and back:


A HIGHPASS filter is the exact opposite of a lowpass filter. It allows only frequencies ABOVE the cutoff point through (it lets the frequencies HIGHer than the cutoff frequency PASS through), so as you increase the cutoff value, more and more low frequencies are filtered out. The higher the cutoff, the less bassy the sound will get until you’re left with only the high frequencies, and eventually, nothing is left. Depending on how they're used, highpass filters can sound light and airy, or aggressive and acidic and get a lot of use in the Goa/Psytrance music. Here's the same sound as above, but sent through a highpass filter:


A BANDPASS filter is sort of what you would expect if a lowpass and a highpass filter were combined (in fact, you can replicate a bandpass filter if you have both a lowpass and highpass simultaneously available like on the Korg MS-20). A bandpass filter filters off the frequencies both above AND below the cutoff frequency, leaving only a relatively narrow BAND of frequencies PASS through. Bandpass filters have a sort of nasal quality and add a really nice variation from the more standard lowpass and highpass filters. Here's our example sound, but this time it's being fed through a bandpass filter.


You may recall that when we first started talking about filters, I mentioned how filters could be used to simulate the way a guitar sound goes from a bright initial sound, fading to a more muted sustain. Having these filters is great, but if you just leave it set to a static cutoff value, all you really have is a glorified bass/treble knob. Sure, if your synth has knobs, you could manually change the cutoff value with each note you played to emulate this effect, but wouldn’t it be great if there was a way your synth could do this automatically for you? Actually, it can! Next post, I’ll introduce the concept of MODULATION to you and you’ll begin to see how a synthesizer can achieve more interesting, dynamic sounds out of the relatively simple architecture we’ve discussed so far.